
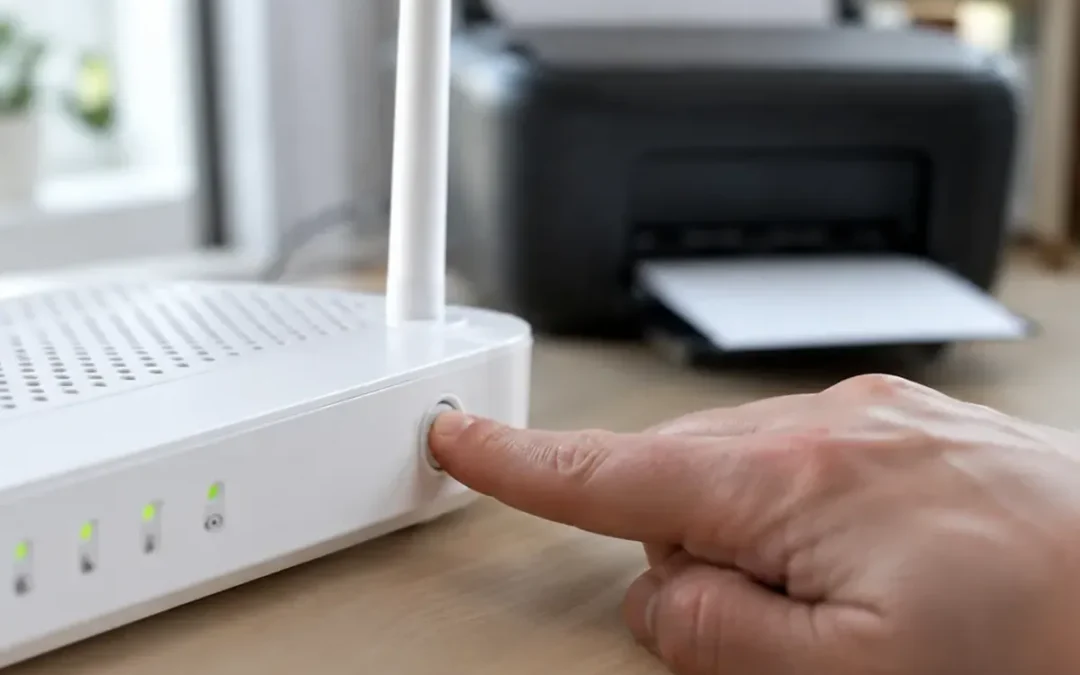
The wps button on router models lets you connect a device to Wi-Fi without typing the password: press the button, then start WPS on the device within two minutes. It is handy for printers and extenders without a screen, but the WPS PIN method has a known security flaw, which is why CISA recommends turning WPS off when you do not need it.
What the WPS Button on a Router Actually Does
Wi-Fi Protected Setup (WPS) is a standard created by Cisco, introduced in 2006, and adopted by the Wi-Fi Alliance to let devices to connect to a WLAN without entering passwords. It was designed to solve the difficulty of entering long passphrases on devices lacking full displays, such as smart TVs and wireless printers from manufacturers like HP, Canon, and Brother. Most wireless routers manufactured over the past decade include WPS functionality.
The physical button is typically located on the rear or side panel of the router, labeled with “WPS” or marked by an icon depicting two curved arrows forming a circle. Activating WPS triggers a sequence of Extensible Authentication Protocol (EAP) messages between the router and the client device, initiated by a button press or PIN entry, establishing an encrypted link without manual passphrase entry.
Push-Button Pairing vs. the WPS PIN
The WPS standard defines two primary pairing mechanisms: Push-Button Configuration (PBC) and Personal Identification Number (PIN) entry. PBC is optional for client devices, while PIN support is mandatory for all WPS-certified hardware.
- Push-Button Configuration (PBC): You press the WPS button on your router and activate WPS on the target device within two minutes; the connection is established automatically.
- WPS PIN Method: This approach uses an eight-digit numeric code that is generated by the router and entered on the client, or vice versa. On many routers, the PIN is printed on a sticker on the underside of the device and remains static unless reset by the user. The PIN method can also be used remotely when a router is difficult to access physically.
On TP-Link routers, there are three ways to use WPS: the physical button, a PIN, or the WPS wizard in the web interface.
Step-by-Step: Connecting a Printer or WiFi Extender
WPS works only with WPA or WPA2 encryption; if the router is configured with outdated WEP encryption, WPS cannot be used.
Connecting a Wireless Printer
- Press the WPS button on your router.
- Start the WPS search on the printer within two minutes.
- The connection negotiates and finishes automatically.
Pairing a Range Extender
When pairing a NETGEAR range extender:
- Place the extender in the same room as the router during setup.
- After powering on, wait until the power LED glows solid green or solid blue.
- Press the WPS button on the extender.
- Within two minutes, press the WPS button on the router.
- Monitor the extender’s WPS LED. The pairing process can take up to two minutes; a successful connection is confirmed when the indicator turns solid green or solid blue.
- After setup, move the extender to a location roughly halfway between the router and the dead zone. The extended network typically adopts the same network name (SSID) as the main network or appends “_EXT”, while the password remains the same.
Understanding Router and Extender WPS LED Lights
Router manufacturers use distinct LED patterns to communicate pairing states:
| Device / Hardware | LED Behavior | Operating Status |
|---|---|---|
| NETGEAR Router | Blinking light | WPS connection in progress |
| NETGEAR Router | Solid light | WPS connection successfully established |
| TP-Link Router (Wi-Fi 5 & 6) | Flashing green | Pairing handshake underway (lasts up to two minutes) |
| TP-Link Router (Wi-Fi 7) | Green checkmark (√) | WPS connection completed successfully |
| TP-Link Router (Wi-Fi 7) | Cross (×) | Pairing attempt failed |
| NETGEAR Range Extender | Solid green or blue | Extender successfully paired |
| Xfinity Gateway (XB7 / XB8) | Blinking blue | Pairing mode active |
| Xfinity Gateway (XB7 / XB8) | Solid white | Successful connection completed |
| Verizon Wireless Router | Slow blinking blue | Pairing mode active |
| Verizon Wireless Router | Fast blinking blue | Successful pairing completed |
The Security Flaw: Why the WPS PIN Is Broken
In December 2011, security researcher Stefan Viehböck revealed a design and implementation flaw that makes brute-force attacks against PIN-based WPS practical.
The vulnerability stems from how an access point evaluates the eight-digit numeric PIN:
- Instead of validating the full 100,000,000 possible eight-digit combinations as a single key, the router evaluates the PIN in two separate halves.
- The router confirms separately whether the first four digits are correct, requiring at most 10,000 possibilities.
- The router then checks the remaining digits. Because the eighth digit is an algorithmic checksum calculated from the preceding seven digits, only three unknown digits remain, requiring a maximum of 1,000 attempts.
This flaw reduces the total combinations an attacker needs to test from 100,000,000 down to at most 11,000 attempts—a reduction of three orders of magnitude. Using tools like Reaver, an attacker can determine the static WPS PIN in 4 to 10 hours, and sometimes faster.
In 2014, security researcher Dominique Bongard discovered the “Pixie Dust” attack, which exploited weak pseudorandom number generators in WPS implementations to calculate the PIN offline in seconds or minutes. Remediation lagged across the industry: a 2025 NetRise study analyzing 24 network devices (including 12 TP-Link models) revealed that only four devices ever received a Pixie Dust patch, with fixes arriving an average of 9.6 years after disclosure. Thirteen unpatched devices remained actively supported, while seven reached end-of-life status without any fix.
Cisco issued a security advisory (cisco-sa-20120111-wps) confirming the design flaw impacted all wireless access points relying on static PINs. In 2012, the Cybersecurity and Infrastructure Security Agency (CISA) published an official warning (TA12-006A) recommending that users disable WPS.
Myths and Misconceptions About WPS
- Myth: Holding down the button improves pairing strength. Holding the WPS button down does not improve signal strength. On TP-Link routers, pressing the button for more than five seconds completely disables the router’s entire Wi-Fi function.
- Myth: Any modern mobile phone can connect using the WPS button. Apple has never supported WPS across iOS, meaning iPhones and iPads offer no WPS connection option. Android removed WPS client functionality starting with Android 9 due to security concerns.
- Myth: Disabling WPS will disconnect your existing wireless devices. Turning off WPS inside your router’s administrative dashboard has no impact on already connected devices, which remain connected using their standard Wi-Fi password. It only prevents new devices from using WPS for initial setup.
- Myth: Toggling WPS to “Off” in the web menu always guarantees it is disabled. Some routers appear to disable WPS in the user interface without actually turning it off. For example, on the Linksys E2000, WPS continued responding to requests even after being disabled in the administrative interface.
Modern Replacements: QR Codes and Wi-Fi Easy Connect
The Wi-Fi Alliance dropped support for WPS with the release of the WPA3 standard in 2018. In pure WPA3-Personal deployments, standard guidelines advise against enabling WPS, and ASUS explicitly confirms that WPA3 does not allow WPS connections.
Modern alternatives include:
- Wi-Fi Easy Connect (Device Provisioning Protocol / DPP): Introduced alongside WPA3 and supported on Android 10 and higher, Easy Connect uses public-key cryptography on the P-256 elliptic curve. Devices exchange public keys via QR code, NFC, or Bluetooth LE. The Configurator scans the Enrollee’s QR code, followed by a three-message authentication handshake and a signed configuration handover via a JWS connector. Easy Connect issues unique credentials per device, allowing individual devices to be revoked without changing the network password.
- Operating System QR Sharing: Android allows sharing network credentials via a QR code displaying network name and password under Settings > Network & internet > Internet > Network > Share. Starting in iOS 18, iPhones can display a network QR code in the Passwords app via Settings > Passwords > Wi-Fi > Show Network QR Code.
How to Disable WPS in Your Router Settings
CISA lists disabling WPS as the first item in its official Project Upskill home Wi-Fi security check. Modern NETGEAR routers ship with WPS disabled by default.
- Sign in to your router’s administrative web interface.
- Navigate to the wireless configuration settings:
- NETGEAR Nighthawk router: Go to Advanced > Wireless Settings and remove the checkmark at Enable WPS.
- TP-Link Router: Go to Wireless > WPS, or check System Tools > System Parameters > WPS to toggle the setting.
- ASUS Router: Go to Wireless > WPS, where you can independently disable the PIN and Push-Button methods.
- Linksys Router: Navigate to Wireless > Wi-Fi Protected Setup and set it to Disabled.
- D-Link Router: Go to Setup > Wireless Settings > WPS and turn it off.
- Apply and save your changes.
Disabling WPS in software disables the physical button on most routers, though on some models the button remains active until all WPS methods are turned off in the admin panel.
Frequently Asked Questions
How to activate WPS mode on router?
On a NETGEAR router, press the physical WPS button once to initiate a two-minute pairing window. On a TP-Link router, press the physical WPS button for exactly one second; pressing it for longer than five seconds turns off the router’s entire Wi-Fi function.
Why is my router not connecting to the internet?
If the problem started right after you used the WPS button, check whether you turned off Wi-Fi by accident: on TP-Link routers, pressing the button for more than five seconds disables the router’s entire Wi-Fi function, and you can switch it back on in the router’s settings. WPS pairing also fails if your router uses outdated WEP encryption instead of WPA or WPA2.
What is a WPS PIN?
A WPS PIN is an eight-digit numeric code printed on the underside of many routers that serves as an authentication key for device registration. The eighth digit is an algorithmic checksum of the first seven digits and does not add to key strength. Because routers validate the first four digits separately, attackers need to test at most 11,000 combinations instead of 100,000,000.
Is it true that you can connect to Wi-Fi by pushing the button on the router?
Yes. With Push-Button Configuration, pressing the button on the router and then on the target device establishes a WPA2-encrypted connection without manual password entry. However, this only works with devices supporting WPS; modern smartphones running Android 9 or newer and all iPhones cannot connect via WPS.
What happens if I accidentally press the WPS button on my router?
Pressing the button opens an active discovery window for approximately two minutes, during which an in-range WPS device could connect without a password. After two minutes, the router automatically times out and returns to normal operation without causing permanent damage.
How long should I hold the WPS button on my router?
On most routers, a single press of about one second is sufficient to activate pairing mode. TP-Link explicitly specifies pressing the button for only one second, as holding it for more than five seconds disables the router’s Wi-Fi. The LED on the router starts blinking when pairing mode is active, signaling that you can release the button.